


Key Takeaways:
- Blooming gel is a specialized nail product that allows for the creation of unique, fluid nail art designs.
- It's applied over a base coat and reacts with gel polish to create a blooming effect.
- This product is user-friendly, making it possible for both professionals and DIY enthusiasts to create intricate nail art effortlessly.
Nail art has always been a canvas for creativity and personal expression. With the advent of blooming gel for nails, the possibilities for intricate and eye-catching designs have expanded exponentially. But what exactly is blooming gel, and how does it revolutionize how we think about nail art?
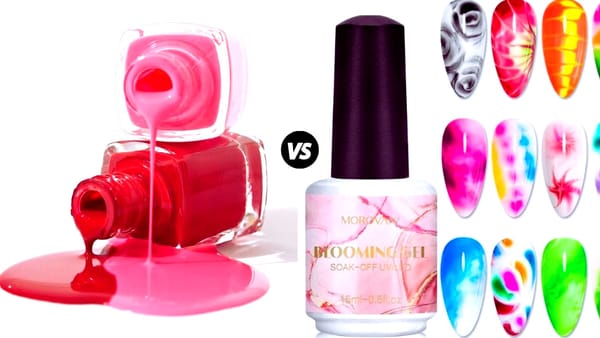
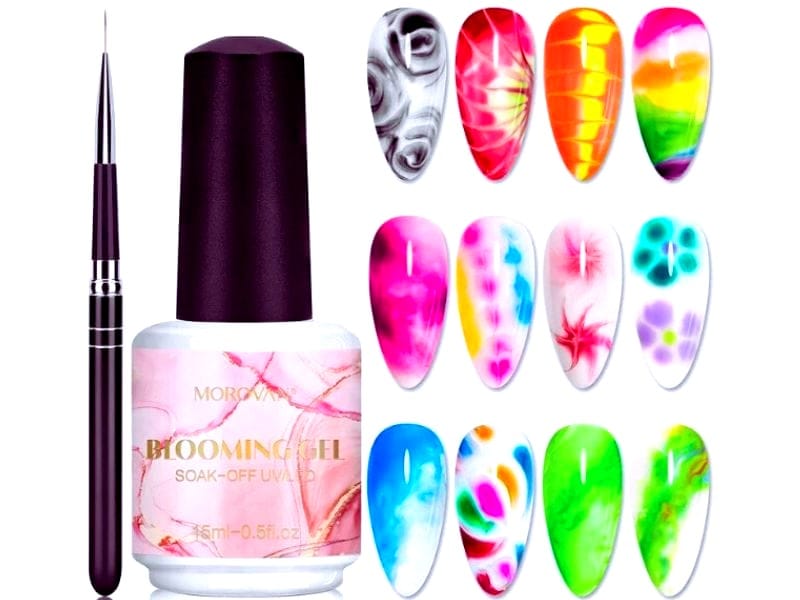
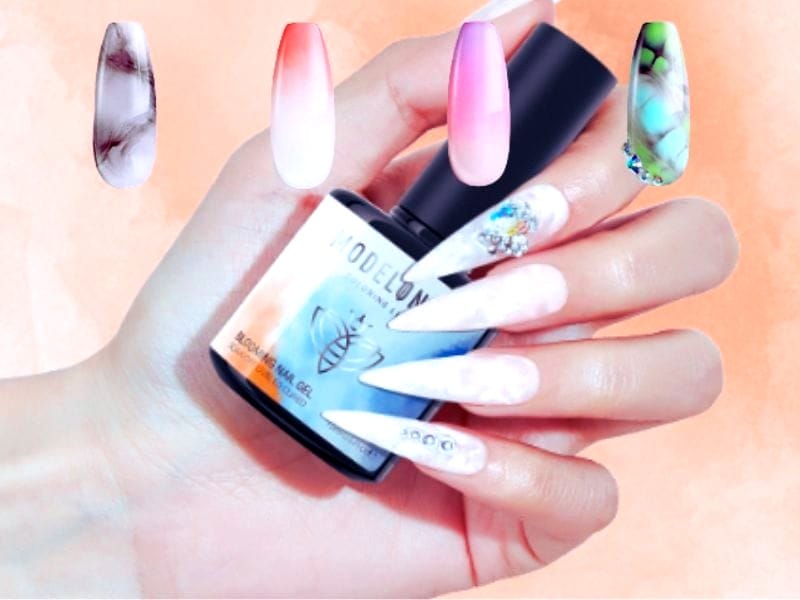
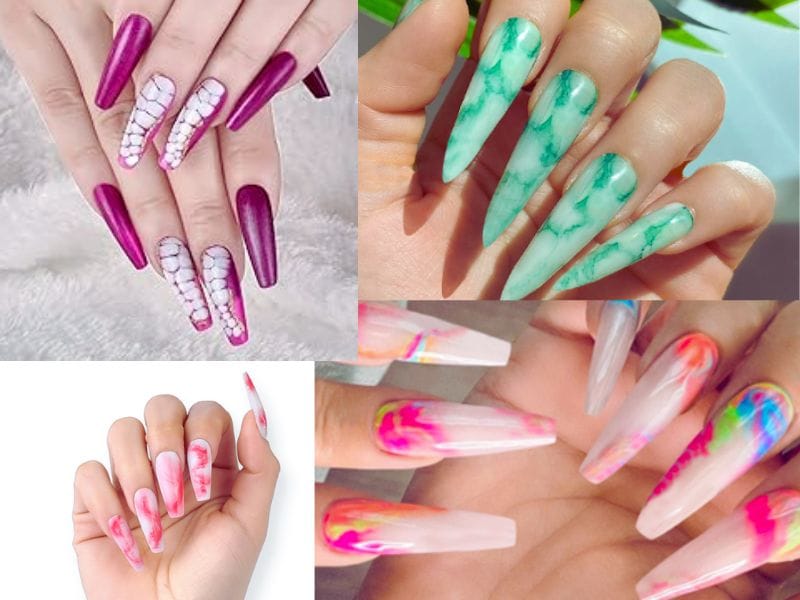
Blooming gel is a clear gel polish that, when applied to the nails, creates an effect similar to ink spreading in water. This unique product is designed to interact with colored gel polish, causing it to disperse and create patterns that resemble natural stone, floral prints, or even tie-dye. The beauty of blooming gel lies in its simplicity; it allows anyone to effortlessly create nail designs with a blooming effect that would otherwise require a steady hand and hours of work.
The Basics of Blooming Gel
Before diving into the intricate world of blooming gel nail art, it's essential to understand the product itself. Blooming gel is a type of clear gel polish that's specifically formulated to spread when it comes into contact with another gel polish. This reaction is what gives the blooming gel its name, as the colors appear to bloom or spread outwards from the point of contact.
To use blooming gel, you start with a base coat on your nails, followed by the blooming gel. Once the blooming gel is applied, add drops of colored gel polish onto the still-wet blooming layer. The magic happens as the colored polish begins to spread, creating the desired effect. This process is not only pretty easy and fun, but it also opens up a world of possibilities for fun nail art designs.
Step-by-Step Application
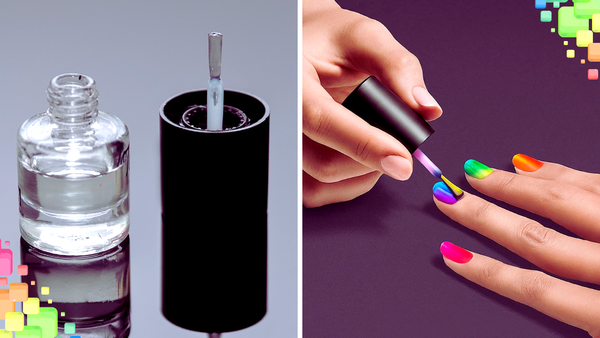
The application of blooming gel is a straightforward process that can yield stunning results. First, prepare your nails with a base coat and cure it under a nail LED lamp. Then, apply a thin layer of blooming gel over the base coat. There's no need to cure the blooming gel just yet; while it's still wet, you can start adding your gel polish color.
Using a fine-tip brush or the polish applicator, add small amounts of colored gel polish onto the blooming gel layer. You'll see the color begin to spread and create patterns. Once you're satisfied with the design, cure it under the lamp to set the blooming effect in place. Finish with a gel topcoat to seal and protect your artwork.
The Art of Blooming Gel Nail Designs
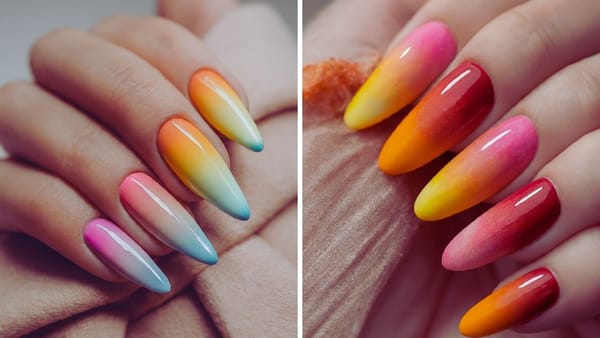
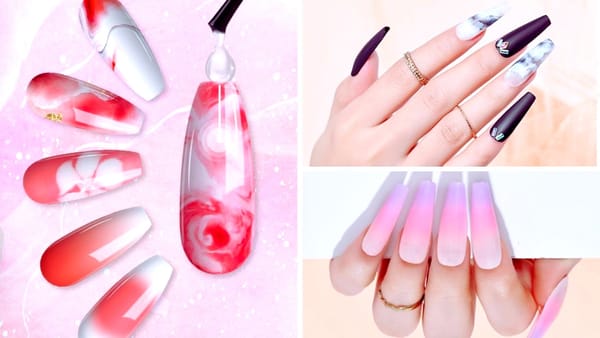
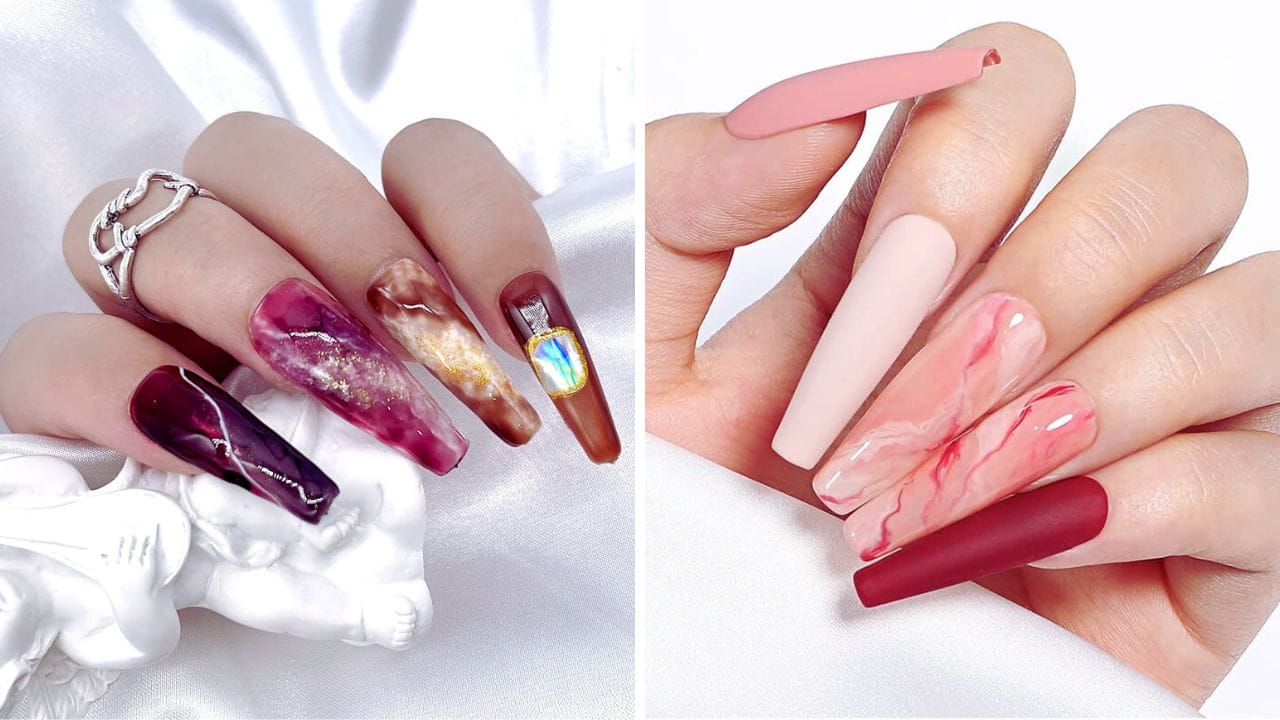
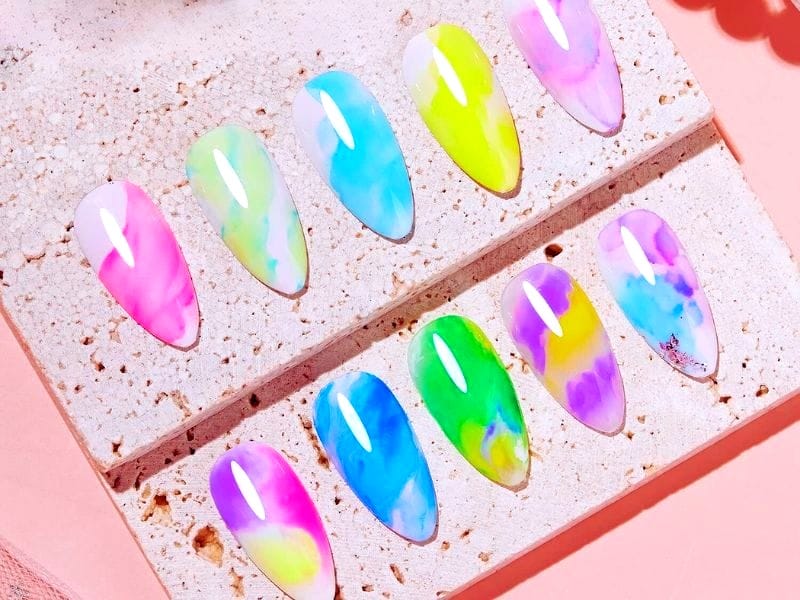
Creating nail designs with blooming gel is where the fun begins. The blooming gel acts as a medium that allows the gel polish color to flow and create natural, organic patterns. You can create a variety of effects, from soft and subtle gradients to bold and dramatic spreads. The key is to experiment with different colors and application techniques.
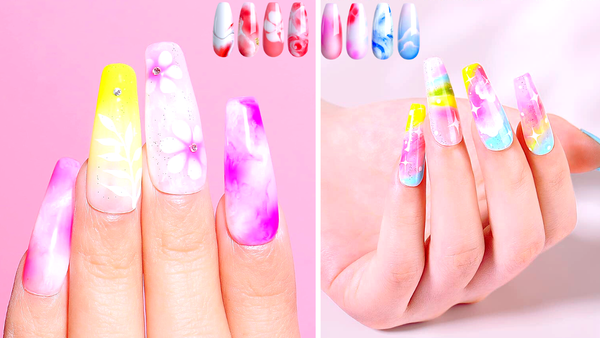
For instance, by strategically placing your gel polish drops, you can create a floral print that mimics the delicate petals of flowers. Alternatively, by using earthy tones and manipulating the spread of the polish, you can achieve a natural stone look that's been a recent nail trend. The versatility of blooming gel makes it a favorite tool for any nail artist looking to push the boundaries of traditional nail art.
Tips for Perfecting the Blooming Effect
Achieving the perfect blooming effect requires a bit of practice and some helpful tips. One crucial tip is to work quickly, as the blooming gel begins to set once exposed to air. Another is to use a gel color that contrasts well with the base coat to ensure the design stands out.
Additionally, the amount of gel polish you use will affect the spread of the color. A small drop will create a delicate, subtle effect, while a larger drop will result in a more dramatic bloom. It's also important to remember that the blooming gel should be applied in a thin layer; too much gel can cause the colors to blend too much, losing the distinct blooming pattern.
The Versatility of Blooming Gel
Blooming gel isn't just for creating floral or stone patterns. Its versatility extends to other designs, such as snake print, marble, and abstract art. By altering the way you apply the colored gel polish and how you manipulate the blooming gel, you can create a wide array of designs that reflect your style.
For example, to create a snake print, you can draw thin lines of gel polish over the blooming gel and use a tool to slightly disturb the lines, mimicking the pattern of snakeskin. For a marble effect, you can swirl different shades together before they fully spread, creating the intricate look of marbled stone.
Blooming Gel for Beginners and Professionals
One of the greatest advantages of blooming gel is that it's super easy to use, making it accessible to beginners and professional nail techs. For those new to nail art, blooming gel provides an easy way to create fancy designs without the need for advanced skills. Professionals can use blooming gel to quickly add intricate designs to their clients' nails, offering a unique service that sets them apart.
Whether at home experimenting with new nail art or a seasoned nail tech looking to offer the latest nail trends, blooming gel is a valuable addition to your nail art arsenal. With practice, anyone can create unique designs that turn heads.
Caring for Blooming Gel Nails
To ensure your blooming gel nail art lasts, proper care is essential. After curing your design, always apply a top coat to seal and protect the artwork. This will prevent chipping and keep the design looking fresh for longer. Additionally, avoid using your nails as tools to prevent any damage to the gel.
When removing, blooming gel nails should be treated like any other gel polish. Soak-off methods are recommended, using acetone and cotton pads or foil wraps to gently remove the gel without damaging the natural nail.
Summary
Blooming gel for nails is a game-changer in nail art, offering an easy and fun way to create stunning, professional-looking designs. Whether you're a DIY enthusiast or a seasoned nail artist, blooming gel allows you to effortlessly create nail designs with a blooming effect that's both elegant and playful. The possibilities are endless with the correct application techniques and a bit of creativity.
FAQ Section
Can blooming gel be used with regular nail polish?
Blooming gel is specifically designed to work with gel polish. Regular nail polish does not have the same properties and will not create a blooming effect when used with blooming gel.
How long do blooming gel nail designs last?
With proper application and care, blooming gel nail designs can last as long as regular gel polish, typically around two to three weeks.
Do I need a UV or LED lamp to cure blooming gel nails?
Like regular gel polish, blooming gel requires curing under a UV or LED lamp to set the design and ensure longevity.